
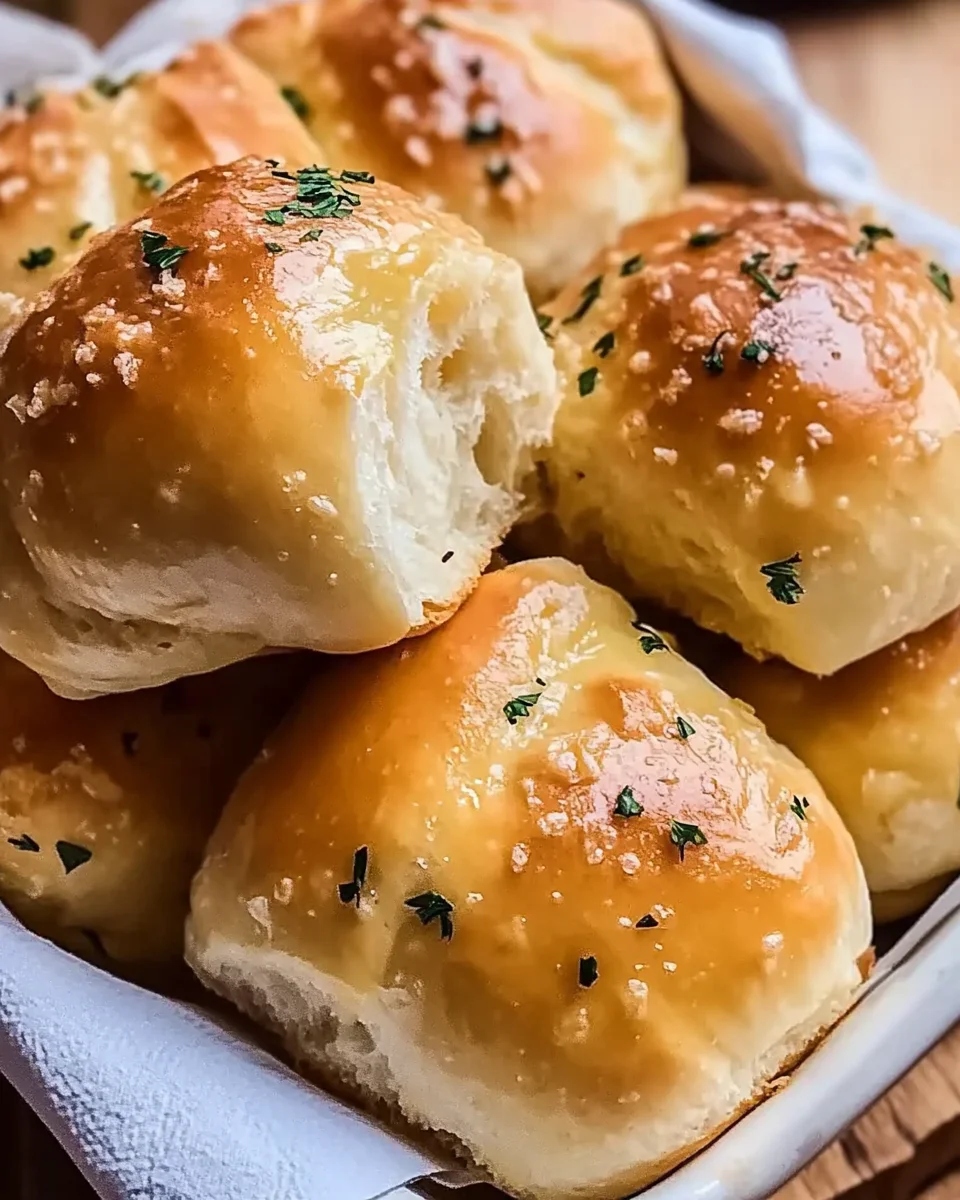
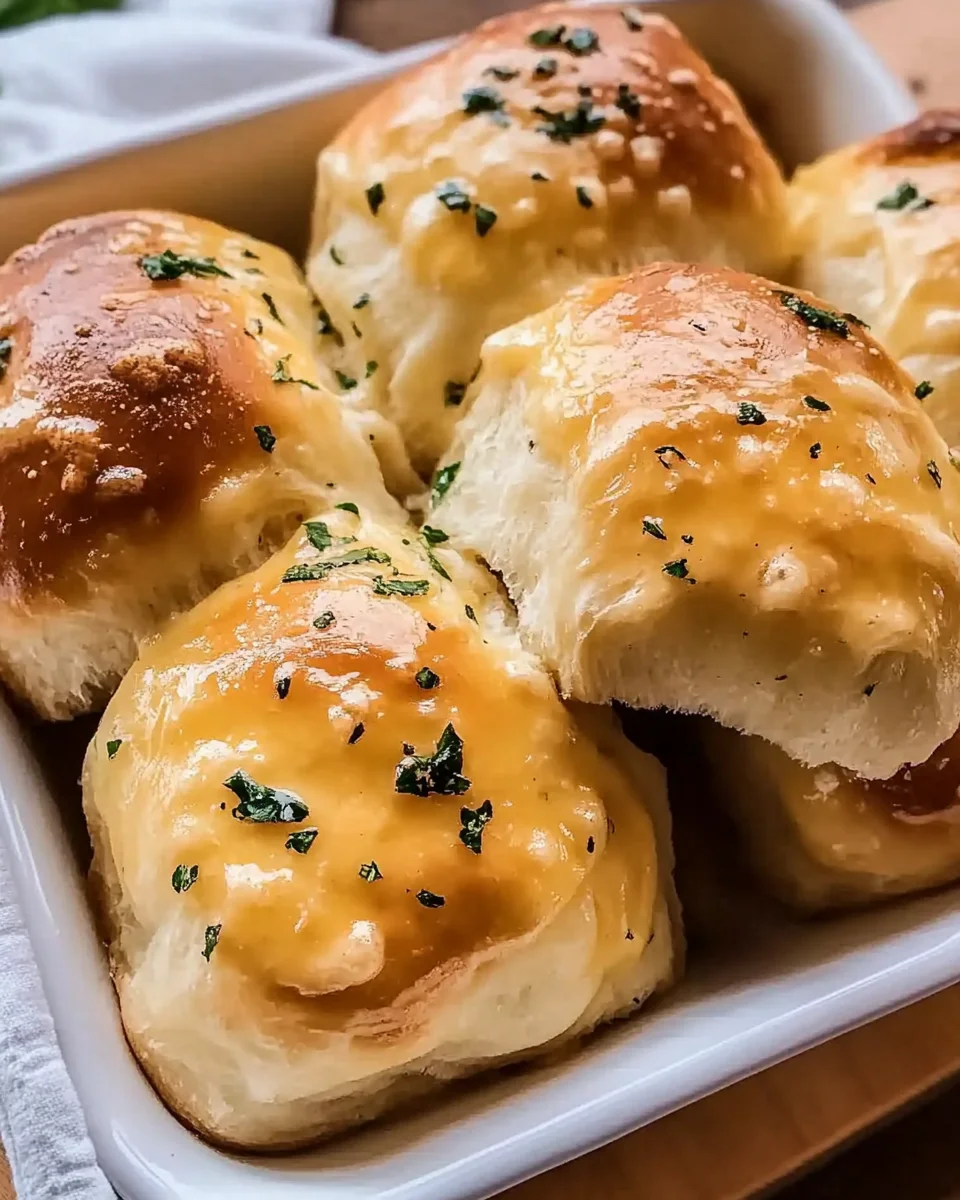
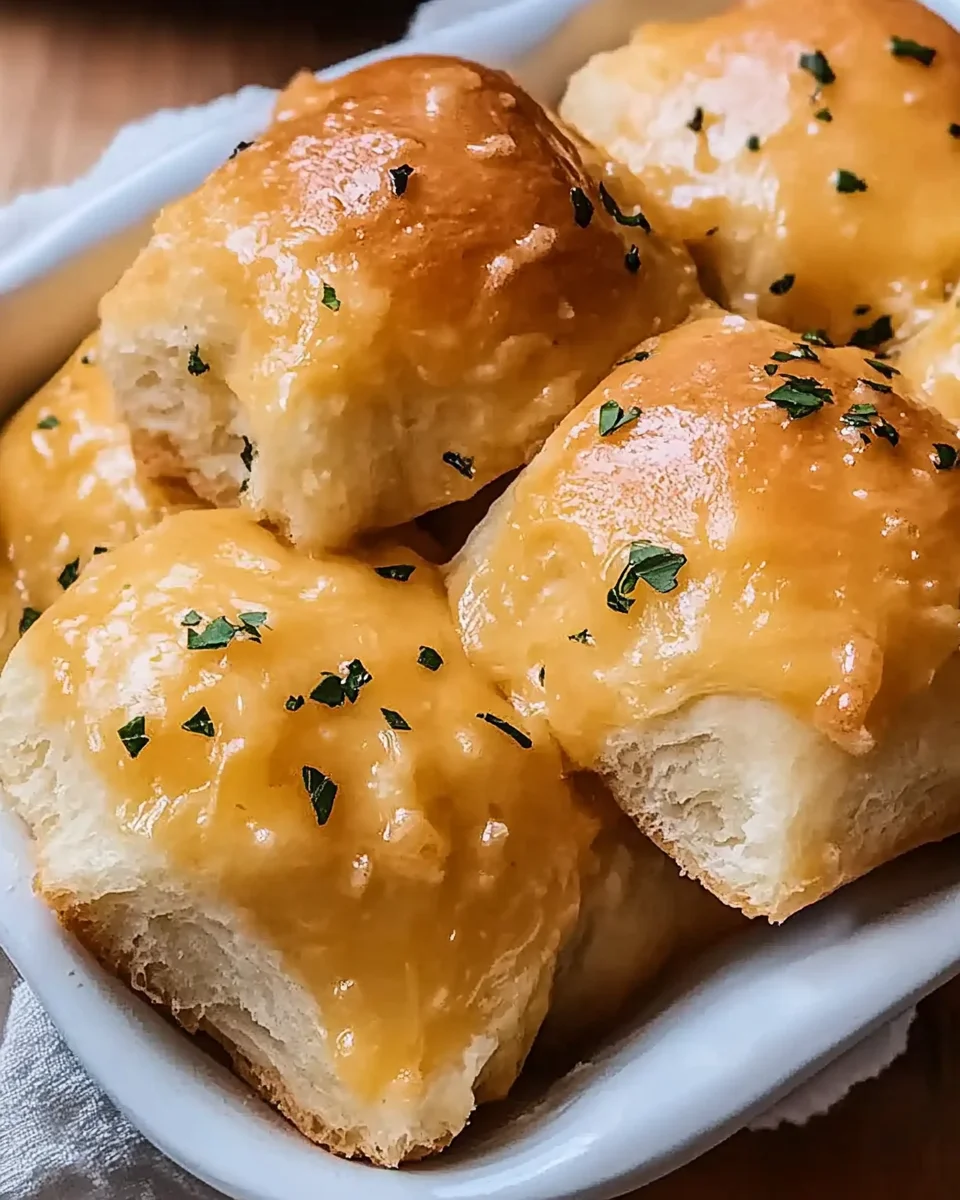
Pillowy and indulgent, Cheesy Garlic Rolls are the ultimate addition to any meal. These soft dinner rolls are filled with sharp cheddar, fresh garlic, and chives, then brushed with a buttery garlic mix that elevates their flavor to new heights. Perfect for family dinners, gatherings, or simply enjoying on a cozy night in, these rolls will impress both friends and family alike.
Why You’ll Love This Recipe
- Delicious Flavor: The combination of sharp cheddar and fresh garlic creates a mouthwatering taste that complements any dish.
- Easy to Make: With simple ingredients and straightforward instructions, even novice bakers can whip these up effortlessly.
- Versatile Side Dish: Great for any occasion—from barbecues to holiday feasts—these rolls go well with all kinds of meals.
- Perfectly Soft Texture: The secret lies in the dough, which results in fluffy rolls that are light yet satisfying.
- Impressive Presentation: Serve these warm and brushed with garlic butter for a restaurant-quality touch at your dining table.
Tools and Preparation
To make these delicious Cheesy Garlic Rolls, you’ll need some essential kitchen tools. Having the right equipment makes the process smoother and more enjoyable.
Essential Tools and Equipment
- Stand mixer with dough hook
- Measuring cups
- Measuring spoons
- 9×13 inch baking pan
- Clean kitchen towel
Importance of Each Tool
- Stand mixer with dough hook: This tool helps knead the dough efficiently, saving you time and effort.
- Measuring cups: Accurate measurements are crucial for perfect results in baking.
- 9×13 inch baking pan: Ideal for accommodating all 12 rolls while ensuring even baking.
Ingredients
Pillowy soft dinner rolls packed with sharp cheddar, fresh garlic, and chives, then brushed with garlic butter. The perfect side for any meal.
Ingredients:
– 4 cups (500g) all-purpose flour, divided.
– 2 envelopes (4½ teaspoons) rapid-rise yeast.
– ¼ cup (50g) granulated sugar.
– 1 large egg, room temperature.
– 1 teaspoon kosher salt.
– 1½ cups (366g) whole milk.
– 2 cups (226g) sharp cheddar cheese, shredded.
– 1 tablespoon fresh garlic, minced.
– 1 tablespoon fresh chives, minced.
– 2 tablespoons salted butter, melted.
– 1 teaspoon fresh garlic, minced (for brushing).
– 1 teaspoon fresh chives, minced (for brushing).
– 1 teaspoon kosher salt (for sprinkling).
For Garnish
- 2 tablespoons fresh parsley, finely chopped
How to Make Cheesy Garlic Rolls
Step 1: Mix Dry Ingredients
Start by mixing the dry ingredients in your stand mixer.
1. Combine 3 cups of flour, yeast, sugar, egg, and kosher salt in the bowl of your stand mixer using the dough hook attachment.
Step 2: Add Warm Milk
Warm up your milk to about 110-115°F before adding it to the dry mixture.
1. Knead on medium speed for about 2 minutes until combined.
Step 3: Incorporate More Flour
Next, add half a cup of flour to the mixture.
1. Continue kneading for another 2 minutes until smooth.
Step 4: Add Cheese and Herbs
Now it’s time to add flavor!
1. Mix in remaining flour along with sharp cheddar cheese, minced garlic, and chives.
2. Knead until a soft dough forms.
Step 5: Let Dough Rise
Cover the bowl with a clean kitchen towel and let it rise in a warm place for about 45 minutes or until doubled in size.
Step 6: Shape Dough Balls
Once risen, punch down the dough gently to release air bubbles.
1. Divide the dough into twelve equal balls.
Step 7: Prepare Baking Pan
Grease your 9×13 inch baking pan lightly.
1. Place each ball of dough into the pan evenly spaced apart.
Step 8: Second Rise
Cover again and let the rolls rise for an additional 30 minutes until puffy.
Step 9: Preheat Oven
While waiting for the second rise, preheat your oven to 375°F.
Step 10: Bake Rolls
Bake the rolls in your preheated oven for about 22-27 minutes or until they turn golden brown on top.
Step 11: Brush with Garlic Butter
In a small bowl, mix melted butter with minced garlic and chives.
1. Brush this mixture generously over the warm rolls as soon as they come out of the oven.
Step 12: Serve Warm
Sprinkle lightly with kosher salt before serving warm alongside your favorite dishes!
How to Serve Cheesy Garlic Rolls
Cheesy garlic rolls are a delightful addition to any meal. Their soft texture and rich flavor make them perfect for various occasions. Here are some serving suggestions to enhance your dining experience.
Pair with Soup
- Hearty Tomato Soup – The acidity of tomato soup perfectly balances the cheesy richness of the rolls.
- Creamy Potato Soup – Enjoy these rolls dipped into a warm, creamy potato soup for comfort on chilly days.
Add as a Side Dish
- Grilled Chicken – Serve these rolls alongside grilled chicken for a delicious and satisfying meal.
- Steak Dinner – Complement your steak dinner with these cheesy rolls for an indulgent touch.
Serve with Salad
- Caesar Salad – The crunch of romaine and the flavors of Caesar dressing pair well with warm cheesy garlic rolls.
- Mixed Greens – A light mixed greens salad provides freshness that contrasts nicely with the rich rolls.
Enjoy as a Snack
- With Garlic Butter Dip – For an extra treat, serve them with a side of garlic butter for dipping.
- Cheese Platter – Include these rolls in a cheese platter for a fun appetizer option at gatherings.
How to Perfect Cheesy Garlic Rolls
Creating the perfect cheesy garlic rolls requires attention to detail. Here are some tips to ensure your rolls turn out fluffy and flavorful every time.
- Use Fresh Ingredients – Always use fresh garlic and chives for the best flavor in your rolls.
- Monitor Milk Temperature – Ensure the milk is warmed to 110-115°F; too hot can kill the yeast, while too cold can slow down rising.
- Knead Thoroughly – Knead until the dough is soft and elastic, which helps create that pillowy texture.
- Allow Proper Rising Time – Don’t rush the rising process; letting the dough double in size contributes to fluffy rolls.
- Brush Generously with Butter – A good brush of melted garlic butter right after baking adds moisture and flavor.
- Serve Warm – These rolls are best enjoyed warm, so consider serving them immediately after baking.
Best Side Dishes for Cheesy Garlic Rolls
Cheesy garlic rolls can elevate any meal, but they also shine when paired with the right sides. Here are some excellent options to consider.
- Roasted Vegetables – Colorful roasted veggies add nutrition and balance to your meal alongside cheesy garlic rolls.
- Coleslaw – A tangy coleslaw provides a crunchy contrast that complements the soft texture of the rolls.
- Mashed Potatoes – Creamy mashed potatoes create a comforting combination when served with these fluffy rolls.
- Baked Ziti – Pairing with baked ziti makes for an indulgent Italian-inspired feast you won’t forget.
- Chili Con Carne – The hearty nature of chili pairs wonderfully with these cheesy delights, perfect for chilly evenings.
- Stuffed Peppers – These add a colorful element and pack in more flavors alongside your garlic rolls.
Common Mistakes to Avoid
Making Cheesy Garlic Rolls can be simple, but there are a few common mistakes that can lead to less-than-perfect results. Here’s how to avoid them:
-
Skipping the yeast activation: Always ensure that your yeast is fresh and active. If you skip this step, your rolls may not rise properly. Activate your yeast in warm milk for best results.
-
Using cold ingredients: Cold ingredients can hinder the dough from rising. Make sure your egg and milk are at room temperature before mixing them with other ingredients.
-
Not kneading enough: Insufficient kneading can result in dense rolls. Knead the dough thoroughly until it becomes soft and elastic for light and airy rolls.
-
Overcrowding the baking pan: Make sure to space the rolls properly in the pan. If they are too close together, they won’t bake evenly or expand correctly.
-
Ignoring baking times: Each oven is different, so keep an eye on your rolls while baking. Check for a golden brown color rather than relying solely on the timer.
Storage & Reheating Instructions
Refrigerator Storage
- Store leftover Cheesy Garlic Rolls in an airtight container.
- They can last up to 3 days in the refrigerator.
- To maintain freshness, consider wrapping them in aluminum foil before placing them in the container.
Freezing Cheesy Garlic Rolls
- Place cooled rolls in a freezer-safe bag or container.
- They will remain good for up to 3 months when frozen.
- Label the bag with the date for easy tracking.
Reheating Cheesy Garlic Rolls
-
Oven: Preheat to 350°F and wrap rolls in foil. Heat for about 10-15 minutes until warmed through.
-
Microwave: Place a roll on a microwave-safe plate and cover with a damp paper towel. Heat for about 15-20 seconds or until warm.
-
Stovetop: Heat a skillet over medium-low heat and add a tiny bit of butter. Place rolls in the skillet, cover, and heat for about 5 minutes until warmed.
Frequently Asked Questions
How do I make Cheesy Garlic Rolls gluten-free?
You can substitute all-purpose flour with a gluten-free flour blend. Ensure the blend contains xanthan gum for better texture.
Can I use other types of cheese?
Yes! Feel free to experiment with different cheeses like mozzarella, gouda, or pepper jack for unique flavors in your cheesy garlic rolls.
What can I serve with Cheesy Garlic Rolls?
These delicious rolls pair well with soups, salads, or pasta dishes. They’re also great as a snack on their own!
How do I know when my rolls are done baking?
Your Cheesy Garlic Rolls should be golden brown on top. You can also tap on them lightly; if they sound hollow, they are ready!
Final Thoughts
These Cheesy Garlic Rolls are not only delightful but also versatile enough to complement any meal. Their fluffy texture combined with cheesy goodness makes them irresistible! Feel free to customize them by adding herbs or spices according to your taste preference. Give this recipe a try; you won’t be disappointed!

Cheesy Garlic Rolls
- Total Time: 47 minutes
- Yield: Approximately 12 servings 1x
Description
Indulge in the delightful experience of Cheesy Garlic Rolls—soft, pillowy dinner rolls brimming with sharp cheddar, fresh garlic, and chives. These rolls are brushed with a luscious garlic butter, taking their flavor to new heights. Whether served at family dinners, gatherings, or cozy nights in, these rolls are a guaranteed crowd-pleaser. With an easy-to-follow recipe and simple ingredients, even novice bakers can create these stunning rolls that make every meal feel special. Pair them with soups, salads, or your favorite main dishes for a versatile addition to your dining repertoire.
Ingredients
- 4 cups all-purpose flour
- 2 envelopes rapid-rise yeast
- ¼ cup granulated sugar
- 1 large egg
- 1 teaspoon kosher salt
- 1½ cups whole milk
- 2 cups sharp cheddar cheese, shredded
- 1 tablespoon fresh garlic, minced
- 1 tablespoon fresh chives, minced
- 2 tablespoons salted butter, melted
Instructions
- In a stand mixer bowl, combine 3 cups of flour, yeast, sugar, egg, and kosher salt.
- Warm the milk to 110-115°F and add it to the dry mixture. Knead on medium speed for about 2 minutes.
- Add the remaining half cup of flour and knead until smooth.
- Mix in cheddar cheese, garlic, and chives until a soft dough forms.
- Cover the dough with a towel and let it rise in a warm place for about 45 minutes until doubled.
- Punch down the dough gently and divide into twelve equal balls.
- Place the balls in a greased 9×13 inch baking pan and let rise again for 30 minutes.
- Preheat oven to 375°F while the rolls rise.
- Bake for about 22-27 minutes until golden brown.
- Brush warm rolls with melted butter mixed with garlic and chives before serving.
- Prep Time: 20 minutes
- Cook Time: 27 minutes
- Category: Side Dish
- Method: Baking
- Cuisine: American
Nutrition
- Serving Size: 1 roll (85g)
- Calories: 240
- Sugar: 3g
- Sodium: 290mg
- Fat: 8g
- Saturated Fat: 4g
- Unsaturated Fat: 3g
- Trans Fat: 0g
- Carbohydrates: 34g
- Fiber: 1g
- Protein: 8g
- Cholesterol: 25mg
Keywords: Use fresh ingredients for optimal flavor; fresh garlic and herbs make a significant difference. Ensure your milk temperature is correct to activate the yeast effectively. Don't rush rising times; both rises are crucial for achieving fluffy rolls.