
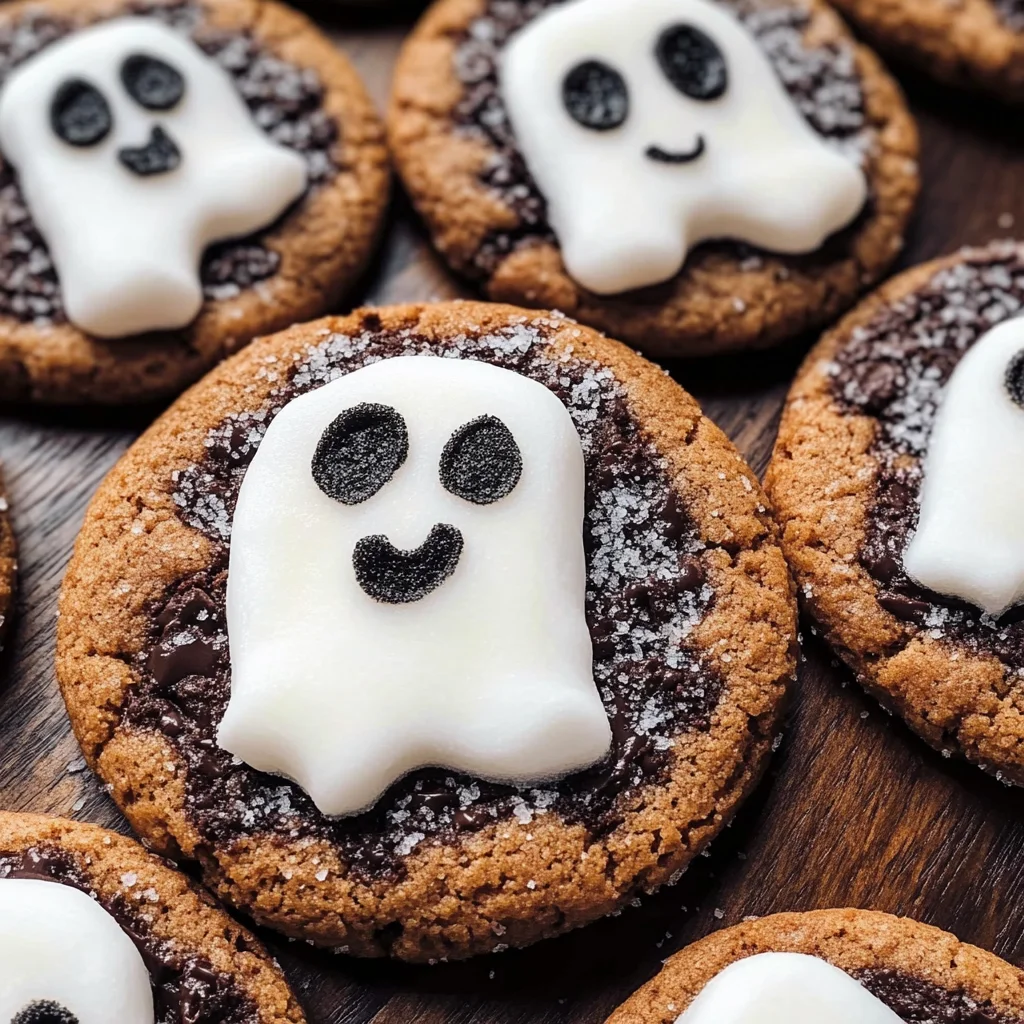
Ghost cookies are the perfect spooky treat for your Halloween celebrations! These delightful cookies not only look cute but are also incredibly easy to make. Using a simple pack of chocolate chunk cookies, you can transform them into these fun ghostly desserts that everyone will love. Whether for a party, school event, or just for fun, ghost cookies add a festive touch to any occasion.
Why You’ll Love This Recipe
- Quick and Easy: With minimal preparation time, you can whip up these treats in just 25 minutes.
- Kid-Friendly: Kids will enjoy helping to decorate these spooky cookies with marshmallows and icing.
- Versatile Treats: Perfect for Halloween parties or as a fun activity during the holiday season.
- Delicious Flavor: The combination of chocolate chunk cookies and sweet icing makes these treats irresistible.
- Cute Presentation: Their ghostly appearance is sure to impress guests and brighten any gathering.
Tools and Preparation
To create your ghost cookies, you’ll need some essential tools that will simplify the process.
Essential Tools and Equipment
- Baking sheet
- Parchment paper
- Mixing bowl
- Spoon or spatula
Importance of Each Tool
- Baking sheet: Provides an even surface for baking your cookies without sticking.
- Parchment paper: Helps prevent sticking and ensures easy cleanup after baking.
- Mixing bowl: Essential for combining your ingredients smoothly and efficiently.
Ingredients
For the Ghost Cookies
- 175g icing sugar
- 1 x 200g pack chocolate chunk cookies
- 9 marshmallows (regular size)
- black writing icing
How to Make Ghost cookies
Step 1: Prepare Your Workspace
Start by preheating your oven according to the cookie package instructions if baking fresh cookies. Line a baking sheet with parchment paper.
Step 2: Decorate the Cookies
- Take the chocolate chunk cookies and place them on your prepared baking sheet.
- In a mixing bowl, prepare the icing sugar by adding a little water until it reaches a spreadable consistency.
- Using a spoon or spatula, generously spread the icing over each cookie.
Step 3: Add Marshmallows
- Cut each marshmallow in half horizontally so you have flat surfaces.
- Place one half of a marshmallow on top of each iced cookie to form the ghost’s head.
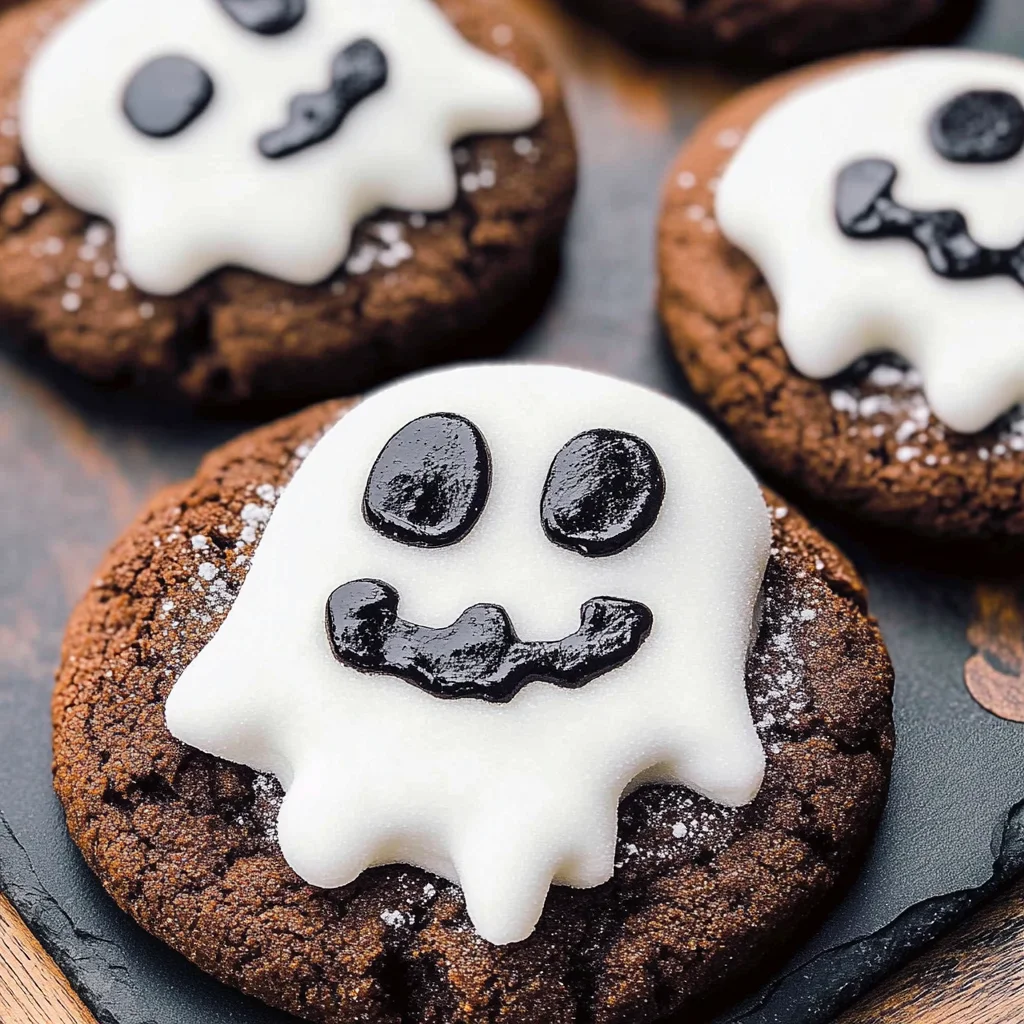
Step 4: Create Faces with Icing
Using black writing icing, draw spooky eyes and mouths on each marshmallow to complete your ghostly decorations!
Now you have delightful ghost cookies ready to be enjoyed at your Halloween festivities!
How to Serve Ghost cookies
Ghost cookies are a delightful treat perfect for Halloween gatherings. They add a fun and spooky touch to any party table while being incredibly easy to make. Here are some creative serving suggestions to elevate your ghostly dessert experience.
Individual Treat Bags
- Fill small clear bags with a few ghost cookies and tie them with a festive ribbon for an easy party favor.
Dessert Platter
- Arrange ghost cookies on a spooky-themed platter along with other Halloween treats such as mini pumpkins or candy corn.
Halloween Cookie Bar
- Set up a DIY cookie bar where guests can decorate their own ghost cookies with extra icing and sprinkles.
Themed Place Settings
- Use ghost cookies as part of your place settings at a Halloween dinner, making each guest feel special with their own treat.
Milk Pairing
- Serve ghost cookies alongside glasses of milk or hot chocolate for a comforting pairing that complements the sweet flavors.
How to Perfect Ghost cookies
Creating the perfect ghost cookies is all about technique and attention to detail. Here are some tips to ensure your spooky treats turn out just right.
- Use Fresh Ingredients: Ensure your chocolate chunk cookies are fresh for the best taste and texture.
- Achieve Smooth Icing: When mixing icing sugar, add water little by little to achieve a smooth, spreadable consistency without lumps.
- Marshmallow Placement: Position marshmallows precisely on the cookie to ensure they resemble ghosts; this will enhance their spooky appearance.
- Practice Writing: Before decorating, practice using black writing icing on parchment paper to get comfortable with creating ghostly faces.
- Chill Before Serving: Allow decorated cookies to chill in the fridge for 10 minutes before serving; this helps set the icing properly.
Best Side Dishes for Ghost cookies
Pairing side dishes with your ghost cookies can enhance the overall Halloween dessert experience. Here’s a list of fun side dishes that will complement your spooky treats perfectly.
- Pumpkin Spice Latte: A warm beverage that adds seasonal flavor and pairs wonderfully with sweet treats.
- Cheese Platter: Include assorted cheeses and crackers for guests who may prefer savory snacks alongside sweets.
- Candy Corn Mix: A colorful mix of candy corn and peanuts provides a crunchy contrast to the soft texture of ghost cookies.
- Mini Pumpkin Pies: These individual pies are festive and delicious, offering another sweet option for dessert lovers.
- Fruit Skewers: Fresh fruit skewers can lighten up the dessert table while adding vibrant colors and flavors.
- Spooky Punch: Serve a fruity punch with floating gummy worms or eyeballs for an eye-catching drink that matches the theme.
Common Mistakes to Avoid
When making ghost cookies, it’s easy to overlook some key steps. Here are a few common mistakes to avoid for perfect spooky treats.
- preparation: Skipping the measurement of ingredients can lead to uneven results. Always use a kitchen scale for accuracy.
- cookie choice: Using the wrong type of cookies can impact flavor. Stick with chocolate chunk cookies as they pair best with the decorations.
- icing application: Applying icing too thickly can cause it to run off the cookies. Use a piping bag for precise control.
- marshmallow placement: Placing marshmallows too close together may cause them to melt into one another. Leave space between each for better design.
- timing oversight: Not allowing enough time for setting can ruin your ghost cookies’ appearance. Let the icing set fully before serving.
Storage & Reheating Instructions
Refrigerator Storage
- Store ghost cookies in an airtight container.
- They’ll stay fresh for up to 5 days in the fridge.
Freezing Ghost cookies
- Wrap each cookie individually in plastic wrap.
- Place them in a freezer-safe bag and store for up to 2 months.
Reheating Ghost cookies
- Oven: Preheat to 350°F (175°C) and warm cookies on a baking sheet for about 5 minutes.
- Microwave: Heat each cookie for about 10-15 seconds, just until warm.
- Stovetop: Place in a pan on low heat, covering it to retain moisture, for a quick warm-up.
Frequently Asked Questions
Here are some common questions about ghost cookies that can help you make the most of this spooky treat.
What makes a good ghost cookie?
A good ghost cookie should have a perfect balance of flavors and textures. Using quality chocolate chunk cookies as your base enhances taste, while proper icing adds visual appeal.
Can I customize my ghost cookies?
Absolutely! You can switch up the decorations or even try different cookie bases like sugar or gingerbread for unique flavors.
How do I ensure my ghost cookies look spooky?
Using black writing icing for facial features is essential. Aim for simple shapes like eyes and mouths to create that classic ghostly look.
Are ghost cookies suitable for kids?
Yes! They are easy to make and fun to decorate, making them perfect Halloween treats for kids’ parties or school events.
Can I make these ahead of time?
Yes! Ghost cookies can be made ahead of time and stored properly, allowing you to enjoy them during your Halloween festivities.
Final Thoughts
Ghost cookies are not only fun but also versatile treats that bring joy to any Halloween celebration. With simple customization options, you can personalize them according to your taste. Get creative and enjoy making these delightful spooky snacks!

Ghost Cookies
- Total Time: 29 minute
- Yield: Makes approximately 9 ghost cookies 1x
Description
Ghost cookies are the ultimate spooky treat for your Halloween celebrations! These adorable cookies are not only visually charming but also incredibly easy to prepare. By starting with a simple pack of chocolate chunk cookies, you can transform them into delightful ghostly delights that will enchant both kids and adults alike. Perfect for Halloween parties, school events, or just for fun at home, these ghost cookies add a festive flair to any gathering. With a quick prep time and a deliciously sweet flavor, they are sure to become a seasonal favorite.
Ingredients
- 175g icing sugar
- 200g chocolate chunk cookies
- 9 regular-sized marshmallows
- black writing icing
Instructions
- Preheat your oven according to the cookie package instructions if baking fresh cookies. Line a baking sheet with parchment paper.
- Place the chocolate chunk cookies on the prepared baking sheet. In a mixing bowl, mix icing sugar with water until it reaches a spreadable consistency. Generously spread icing over each cookie.
- Cut each marshmallow in half horizontally and place one half on top of each iced cookie to form the ghost's head.
- Use black writing icing to draw spooky faces on each marshmallow.
- Prep Time: 15 minutes
- Cook Time: None
- Category: Dessert
- Method: Baking
- Cuisine: Halloween
Nutrition
- Serving Size: 1 serving
- Calories: 150
- Sugar: 18g
- Sodium: 60mg
- Fat: 6g
- Saturated Fat: 2g
- Unsaturated Fat: 3g
- Trans Fat: 0g
- Carbohydrates: 24g
- Fiber: 0g
- Protein: 1g
- Cholesterol: 0mg
Keywords: Use fresh ingredients for optimal taste. Experiment with different cookie bases like sugar or gingerbread for unique flavors. Allow decorated cookies to chill in the fridge for 10 minutes before serving to set the icing.