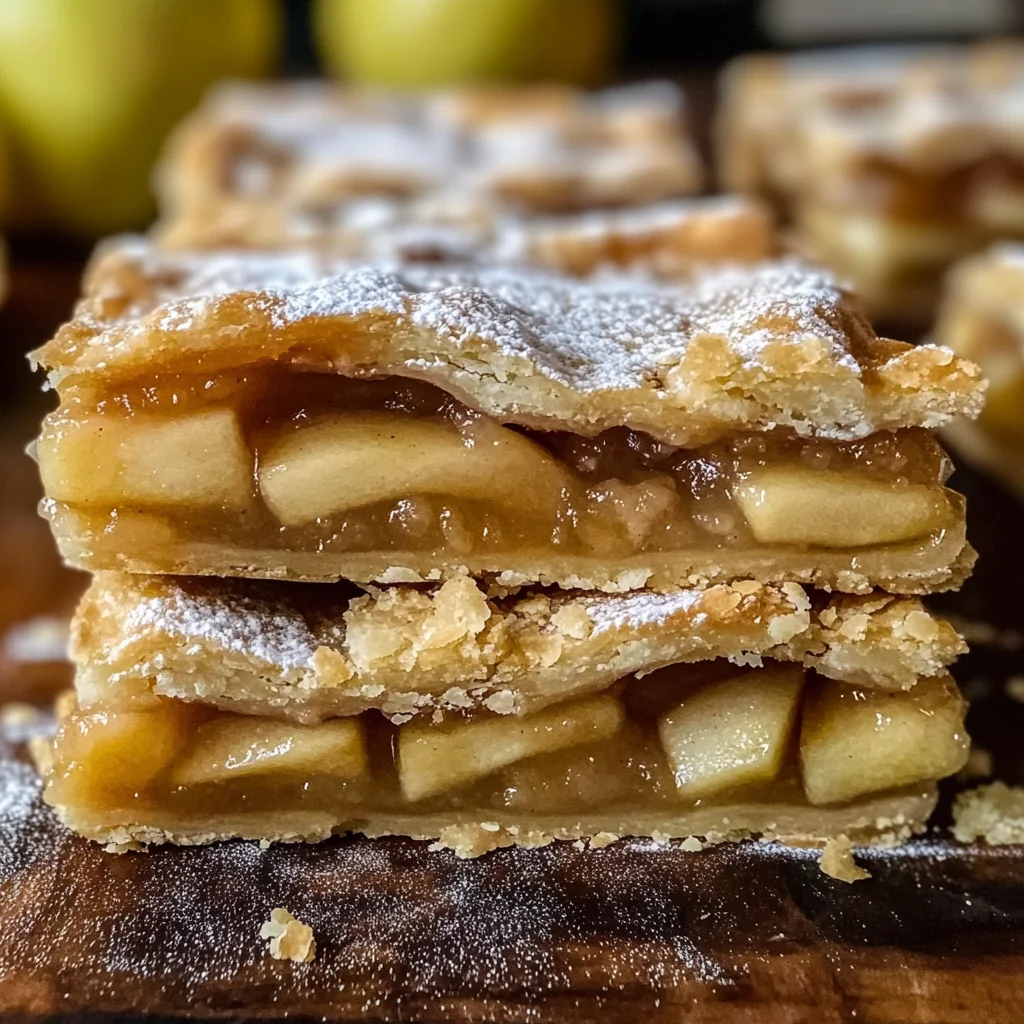
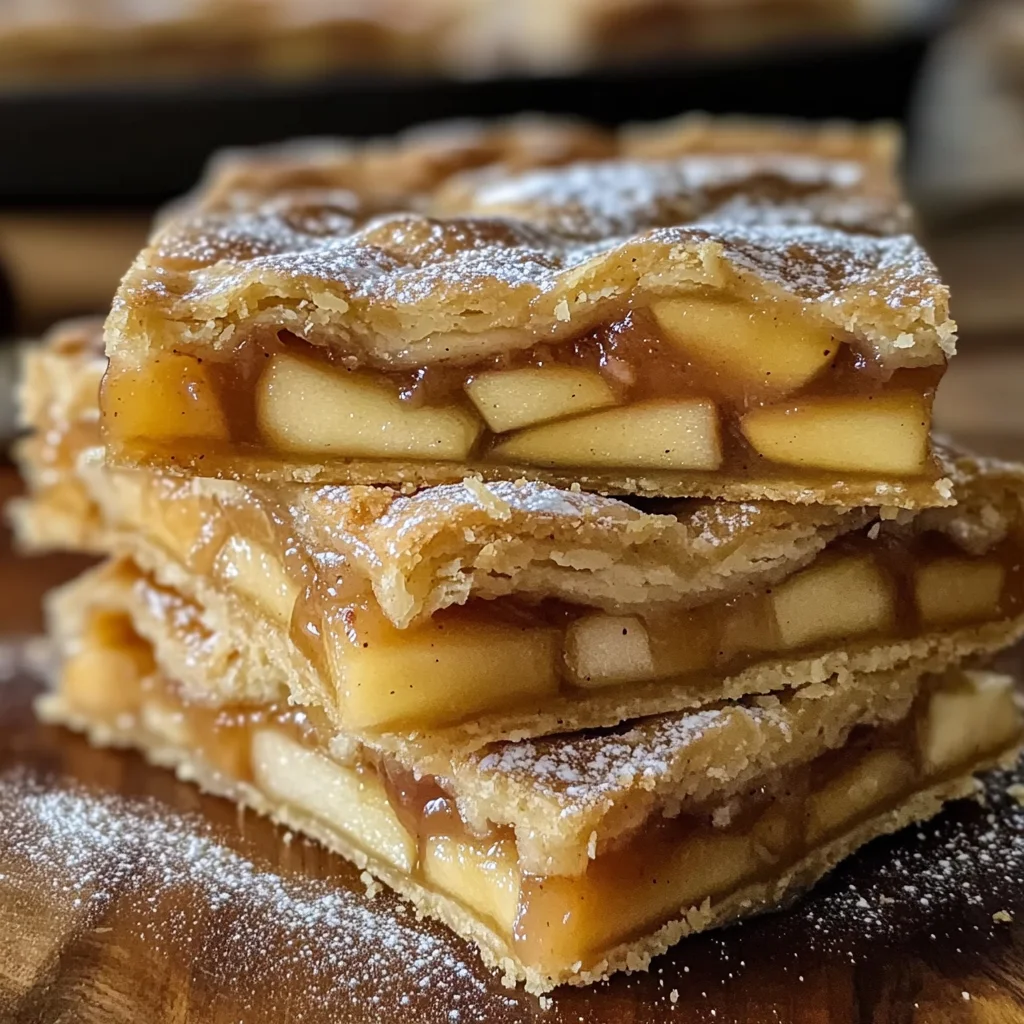
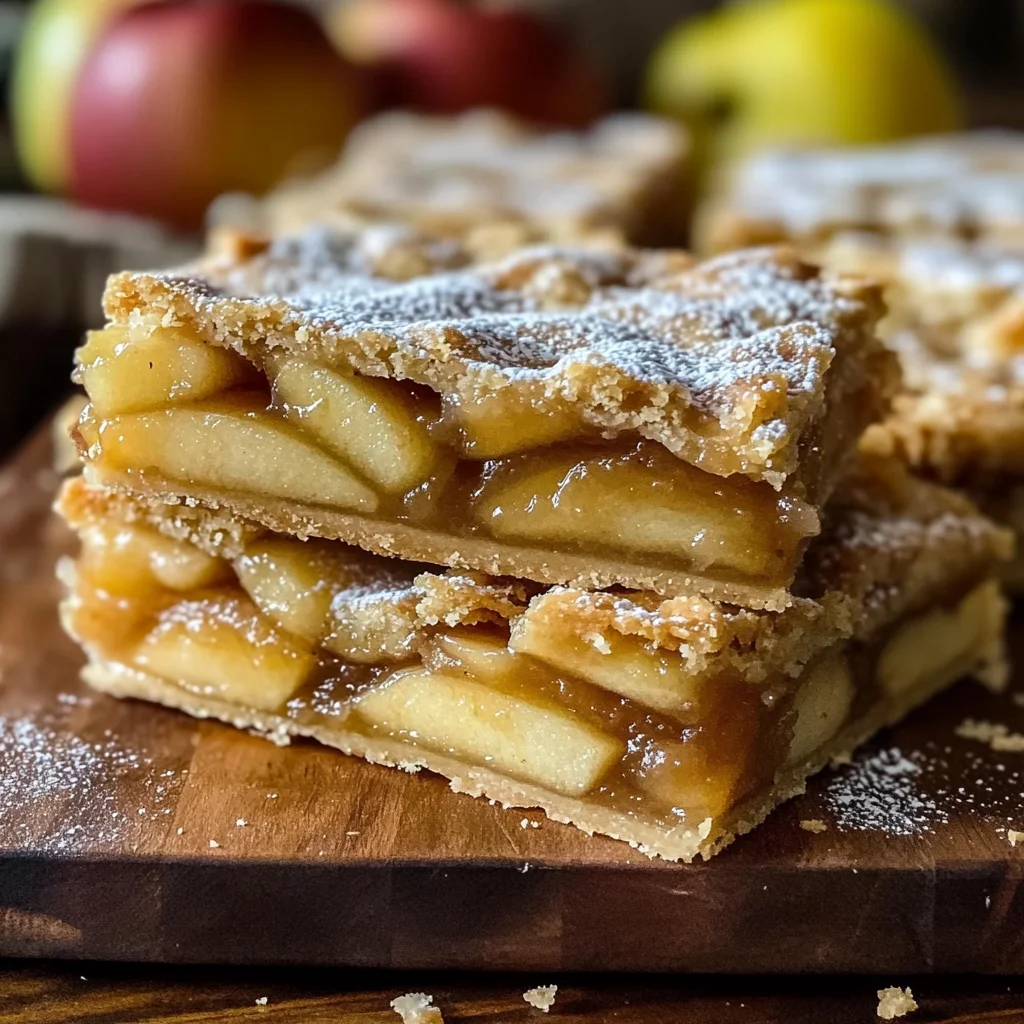
How to Make the Best Apple Pie Bars are a delightful treat that combines the classic flavors of apple pie with the convenience of bar cookies. Perfect for holiday gatherings, potlucks, or just a cozy evening at home, these bars are delicious and easy to make. Their flaky crust and sweet apple filling will impress your family and friends, making any occasion special.
Why You’ll Love This Recipe
- Easy to Prepare: With straightforward steps, even beginner bakers can enjoy making these tasty bars.
- Deliciously Flavorful: The combination of cinnamon-spiced apples and buttery crust creates a satisfying dessert that everyone will love.
- Versatile Dessert: Whether served warm with ice cream or cold with coffee, these apple pie bars fit any mood or season.
- Perfect for Sharing: Cut them into squares for easy serving at parties or potlucks, ensuring everyone gets a taste.
- Quick Cooking Time: Ready in just over an hour, they’re perfect for when you need a quick yet impressive dessert.
Tools and Preparation
To make How to Make the Best Apple Pie Bars, you’ll need some essential kitchen tools. Gathering everything ahead of time will help streamline your baking process.
Essential Tools and Equipment
- Baking pan
- Mixing bowls
- Rolling pin
- Knife
Importance of Each Tool
- Baking pan: A good quality baking pan ensures even cooking and browning of your apple pie bars.
- Mixing bowls: Having multiple sizes helps keep your ingredients organized while preparing your filling and dough.
- Rolling pin: This tool is crucial for achieving a perfectly thin crust that bakes evenly.
- Knife: A sharp knife is essential for cutting apples into uniform pieces for even cooking.
Ingredients
For the Crust
- 2 cups all-purpose flour
- 1 cup unsalted butter, softened
- ½ cup granulated sugar
For the Filling
- 4 cups sliced apples (about 4 medium apples)
- 1 tsp cinnamon
- ½ cup brown sugar
- 1 tbsp lemon juice
How to Make How to Make the Best Apple Pie Bars
Step 1: Preheat the Oven
Start by preheating your oven to 350°F (175°C). This step ensures that your apple pie bars bake evenly from the moment they go in.
Step 2: Prepare the Crust
- In a mixing bowl, combine flour, butter, and sugar.
- Mix until crumbly but holds together when pressed.
- Press this mixture into the bottom of your baking pan evenly.
Step 3: Make the Filling
- In another bowl, toss sliced apples, cinnamon, brown sugar, and lemon juice.
- Ensure all apple slices are well-coated with the mixture.
Step 4: Assemble the Bars
- Spread the apple filling evenly over the crust in your baking pan.
- Optionally sprinkle a little extra cinnamon on top for added flavor.
Step 5: Bake
Place your assembled pan in the preheated oven. Bake for about 40 minutes or until the edges are golden brown and apples are tender.
Step 6: Cool and Serve
Once baked, remove from the oven and allow it to cool in the pan. Cut into squares after cooling completely. Serve warm or at room temperature! Enjoy your delicious apple pie bars!
How to Serve How to Make the Best Apple Pie Bars
Serving apple pie bars can be a delightful experience. These treats are perfect for gatherings, and there are many ways to enjoy them.
Classic with Ice Cream
- Serve warm apple pie bars with a scoop of vanilla ice cream for a classic dessert experience.
Drizzled with Caramel Sauce
- Drizzle caramel sauce over the bars for added sweetness and a touch of decadence.
Topped with Whipped Cream
- A dollop of whipped cream on top gives a light and airy contrast to the rich flavors.
Paired with Coffee or Tea
- Enjoy the bars alongside your favorite coffee or tea for a comforting afternoon snack.
How to Perfect How to Make the Best Apple Pie Bars
Perfecting your apple pie bars is all about attention to detail. Here are some tips to ensure you achieve the best results.
- Use fresh apples: Fresh apples provide the best flavor and texture compared to canned varieties.
- Spice it up: Adding cinnamon and nutmeg enhances the apple flavor, making it more aromatic.
- Don’t overbake: Keep an eye on your baking time; overbaking can lead to dry bars.
- Chill the dough: Chilling your dough before baking helps maintain its shape and flakiness.
- Cut evenly: Use a sharp knife to cut even portions for better presentation and easier serving.
Best Side Dishes for How to Make the Best Apple Pie Bars
Pairing side dishes with apple pie bars can elevate your dessert experience. Here are some great options to consider.
-
Vanilla Ice Cream
A classic pairing that complements the warm spices in apple pie bars perfectly. -
Caramel Sauce
This rich sauce adds extra sweetness and can be drizzled on top or served on the side. -
Whipped Cream
Light and fluffy, whipped cream balances out the sweetness of the bars nicely. -
Coffee
A warm cup of coffee enhances flavors and offers a cozy vibe during dessert time. -
Tea
Herbal or spiced teas can provide a soothing contrast, especially in cooler months. -
Cheese Platter
A selection of mild cheeses adds a savory note that pairs well with sweet desserts like these apple pie bars. -
Fruit Salad
Fresh fruit provides brightness and freshness that helps cleanse the palate after rich desserts. -
Chocolate Sauce
For chocolate lovers, this indulgent addition can turn your apple pie bars into an even more decadent treat!
Common Mistakes to Avoid
When making apple pie bars, it’s easy to make mistakes that can affect the final result. Here are some common pitfalls and how to steer clear of them.
- Boldly skip the chilling step: Not chilling your dough can lead to a tough texture. Always chill your dough before rolling it out.
- Boldly overlook apple types: Using the wrong type of apples will change the flavor and texture. Opt for a mix of sweet and tart apples for balance.
- Boldly ignore measuring ingredients: Guessing measurements can ruin your recipe. Always use precise measurements for best results.
- Boldly rush the baking time: Undercooking can leave your bars soggy. Bake until golden brown for a perfect finish.
- Boldly forget to add spices: Skipping spices like cinnamon or nutmeg can result in bland flavors. Don’t forget to season your filling!
Storage & Reheating Instructions
Refrigerator Storage
- Store in an airtight container for up to 5 days.
- Allow the bars to cool completely before placing them in the fridge.
Freezing How to Make the Best Apple Pie Bars
- Wrap each bar in plastic wrap and place them in a freezer-safe bag.
- They can be frozen for up to 3 months.
Reheating How to Make the Best Apple Pie Bars
- Oven: Preheat to 350°F (175°C) and warm for about 10-15 minutes until heated through.
- Microwave: Heat on medium power for 30 seconds at a time until warm.
- Stovetop: Place in a skillet over low heat, covering with a lid until warmed.
Frequently Asked Questions
Here are some common questions about how to make the best apple pie bars that may help you.
What is the best way to slice apple pie bars?
Use a sharp knife and let the bars cool completely for clean cuts. This helps maintain their shape.
Can I use canned apple pie filling?
Absolutely! Using canned apple pie filling is an easy option if you’re short on time. Just mix it with some spices for extra flavor.
How do I customize my apple pie bars?
You can add nuts, raisins, or caramel drizzle on top. Feel free to adjust spices based on your taste!
How long do these apple pie bars last?
When stored properly, they last up to 5 days in the refrigerator or 3 months in the freezer.
Final Thoughts
These apple pie bars are not just delicious; they’re also versatile and perfect for any occasion. You can easily customize them with your favorite toppings or spices. Give this recipe a try, and enjoy the comforting flavors of apple pie in an easy-to-eat bar form!
How to Make the Best Apple Pie Bars
- Total Time: 1 hour
- Yield: Approximately 12 servings 1x
Description
Indulge in the comforting flavors of homemade apple pie bars with this easy-to-follow recipe! Perfect for any occasion, these delightful treats combine a flaky crust with a sweet, cinnamon-spiced apple filling. Whether you’re hosting a holiday gathering, attending a potluck, or simply enjoying a cozy evening at home, these apple pie bars are sure to impress. With just over an hour to prepare and bake, you can easily whip up a batch that will have your family and friends clamoring for more. Serve them warm with ice cream or enjoy them at room temperature—either way, they make for the perfect dessert!
Ingredients
- 2 cups all-purpose flour
- 1 cup unsalted butter, softened
- ½ cup granulated sugar
- 4 cups sliced apples (about 4 medium apples)
- 1 tsp cinnamon
- ½ cup brown sugar
- 1 tbsp lemon juice
Instructions
- Preheat your oven to 350°F (175°C).
- In a mixing bowl, combine flour, butter, and sugar until crumbly. Press into the bottom of a baking pan.
- Toss sliced apples with cinnamon, brown sugar, and lemon juice until well-coated.
- Spread the apple mixture over the crust evenly.
- Bake in the preheated oven for about 40 minutes until golden brown and apples are tender.
- Allow cooling before cutting into squares and serving.
- Prep Time: 20 minutes
- Cook Time: 40 minutes
- Category: Dessert
- Method: Baking
- Cuisine: American
Nutrition
- Serving Size: 1 bar (70g)
- Calories: 265
- Sugar: 14g
- Sodium: 165mg
- Fat: 15g
- Saturated Fat: 9g
- Unsaturated Fat: 5g
- Trans Fat: 0g
- Carbohydrates: 30g
- Fiber: 2g
- Protein: 2g
- Cholesterol: 35mg
Keywords: For added flavor, consider mixing in chopped nuts or drizzling caramel sauce on top before serving. Use a blend of sweet and tart apples for optimal taste.